

Making my first game in Unreal Engine: Part 1 - from Blender to UE
12th February 2022
This blog post is part of a series of blog posts about Bard Game!
On the 1st of January 2022, I set myself a goal that I would:
I knew this would be a massive undertaking and I really didn’t want to get ahead of myself in terms of the complexity of the game so I teamed up with my best friend Chad who is also a UE4 hobbyist and had been working on a game of his own for quite some time.
12th February 2022
This blog post is part of a series of blog posts about Bard Game!
On the 1st of January 2022, I set myself a goal that I would:
- Learn Unreal Engine 4 (UE4)
- Start making a game
- Finish the game by the end of the year
I knew this would be a massive undertaking and I really didn’t want to get ahead of myself in terms of the complexity of the game so I teamed up with my best friend Chad who is also a UE4 hobbyist and had been working on a game of his own for quite some time.
Playlist of all Bard Game demos
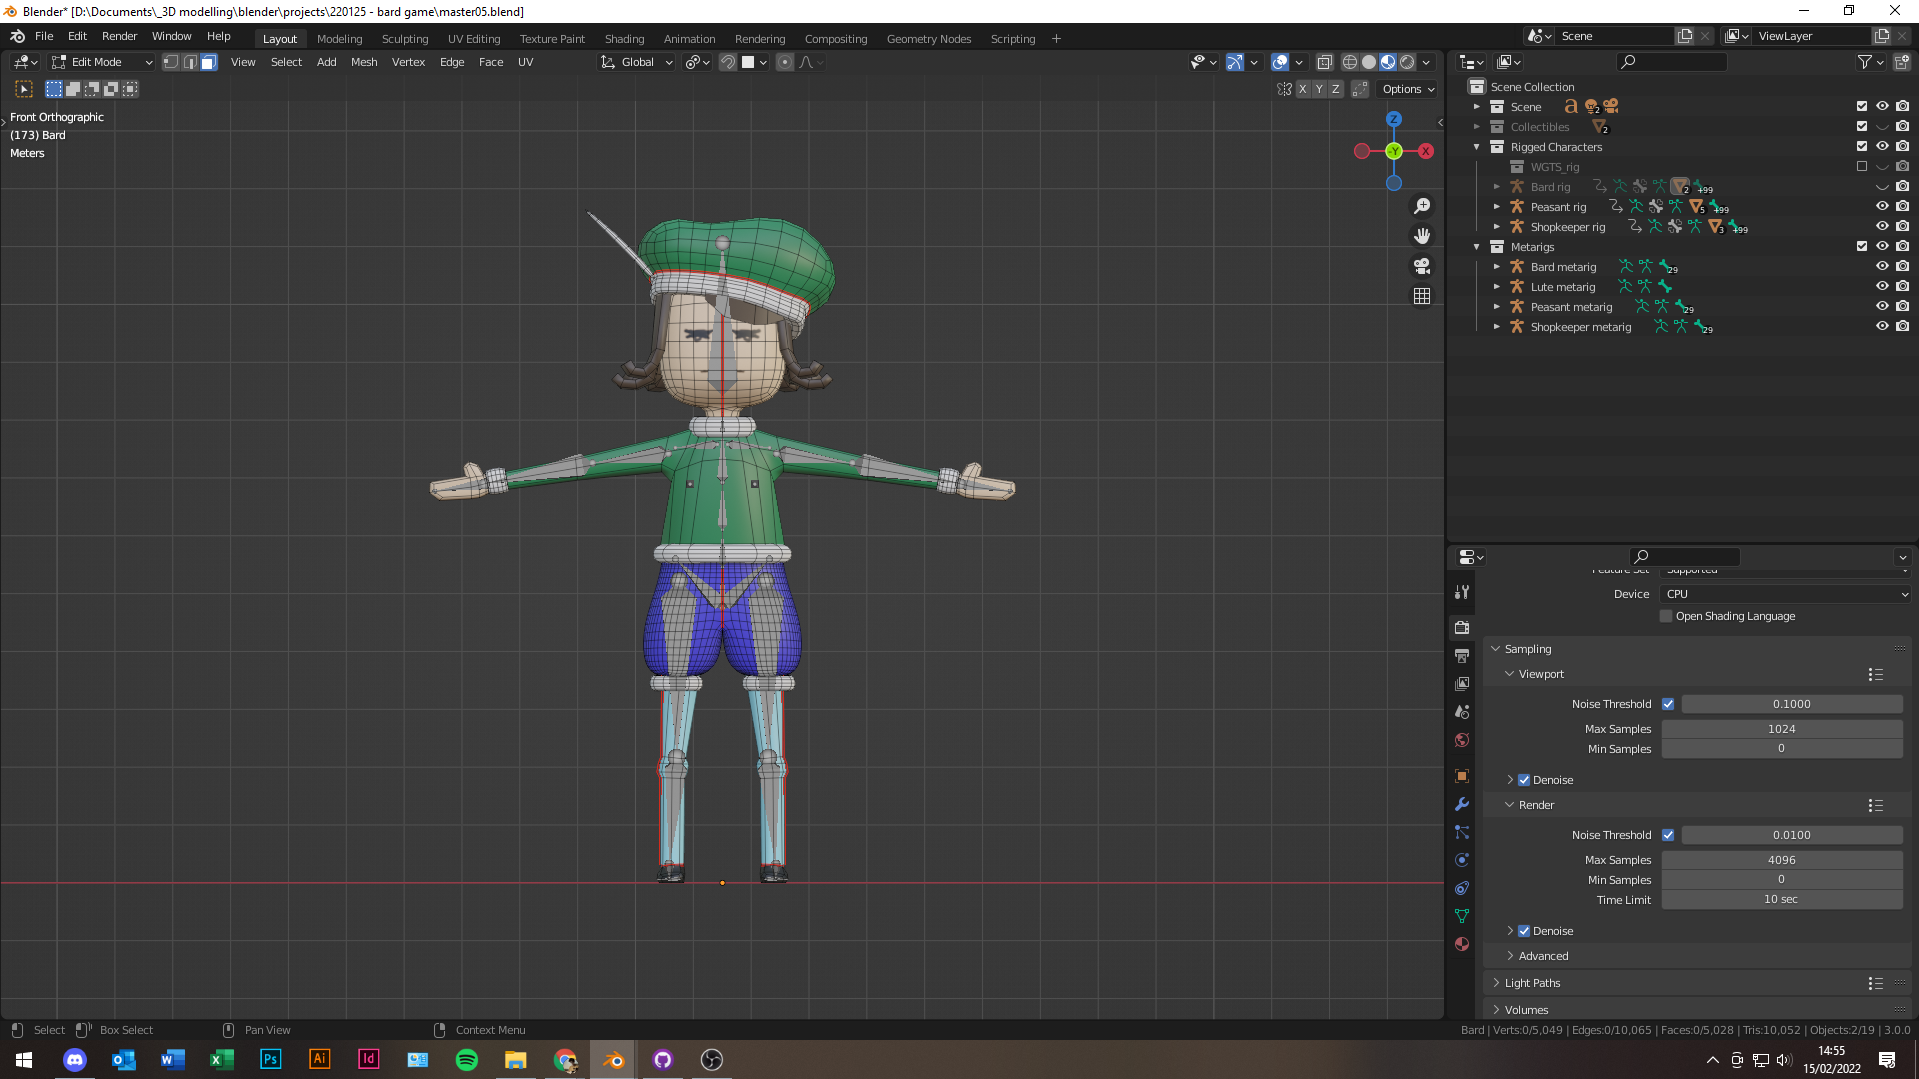
The main character “The Bard”
Chad, myself and our friend Josh were in a Discord call, throwing ideas around and my friend Josh suggested that I model the Bard character from a board game we had been developing on the side.
I went ahead and modelled the Bard in Blender, unwrapped him in such a way that I could paint textures onto his face and flat shade the rest of his clothes, rigged him, gave him some default animations using Mixamo (to save time) and then he was ready to send as an .FBX file to Chad export to UE4!
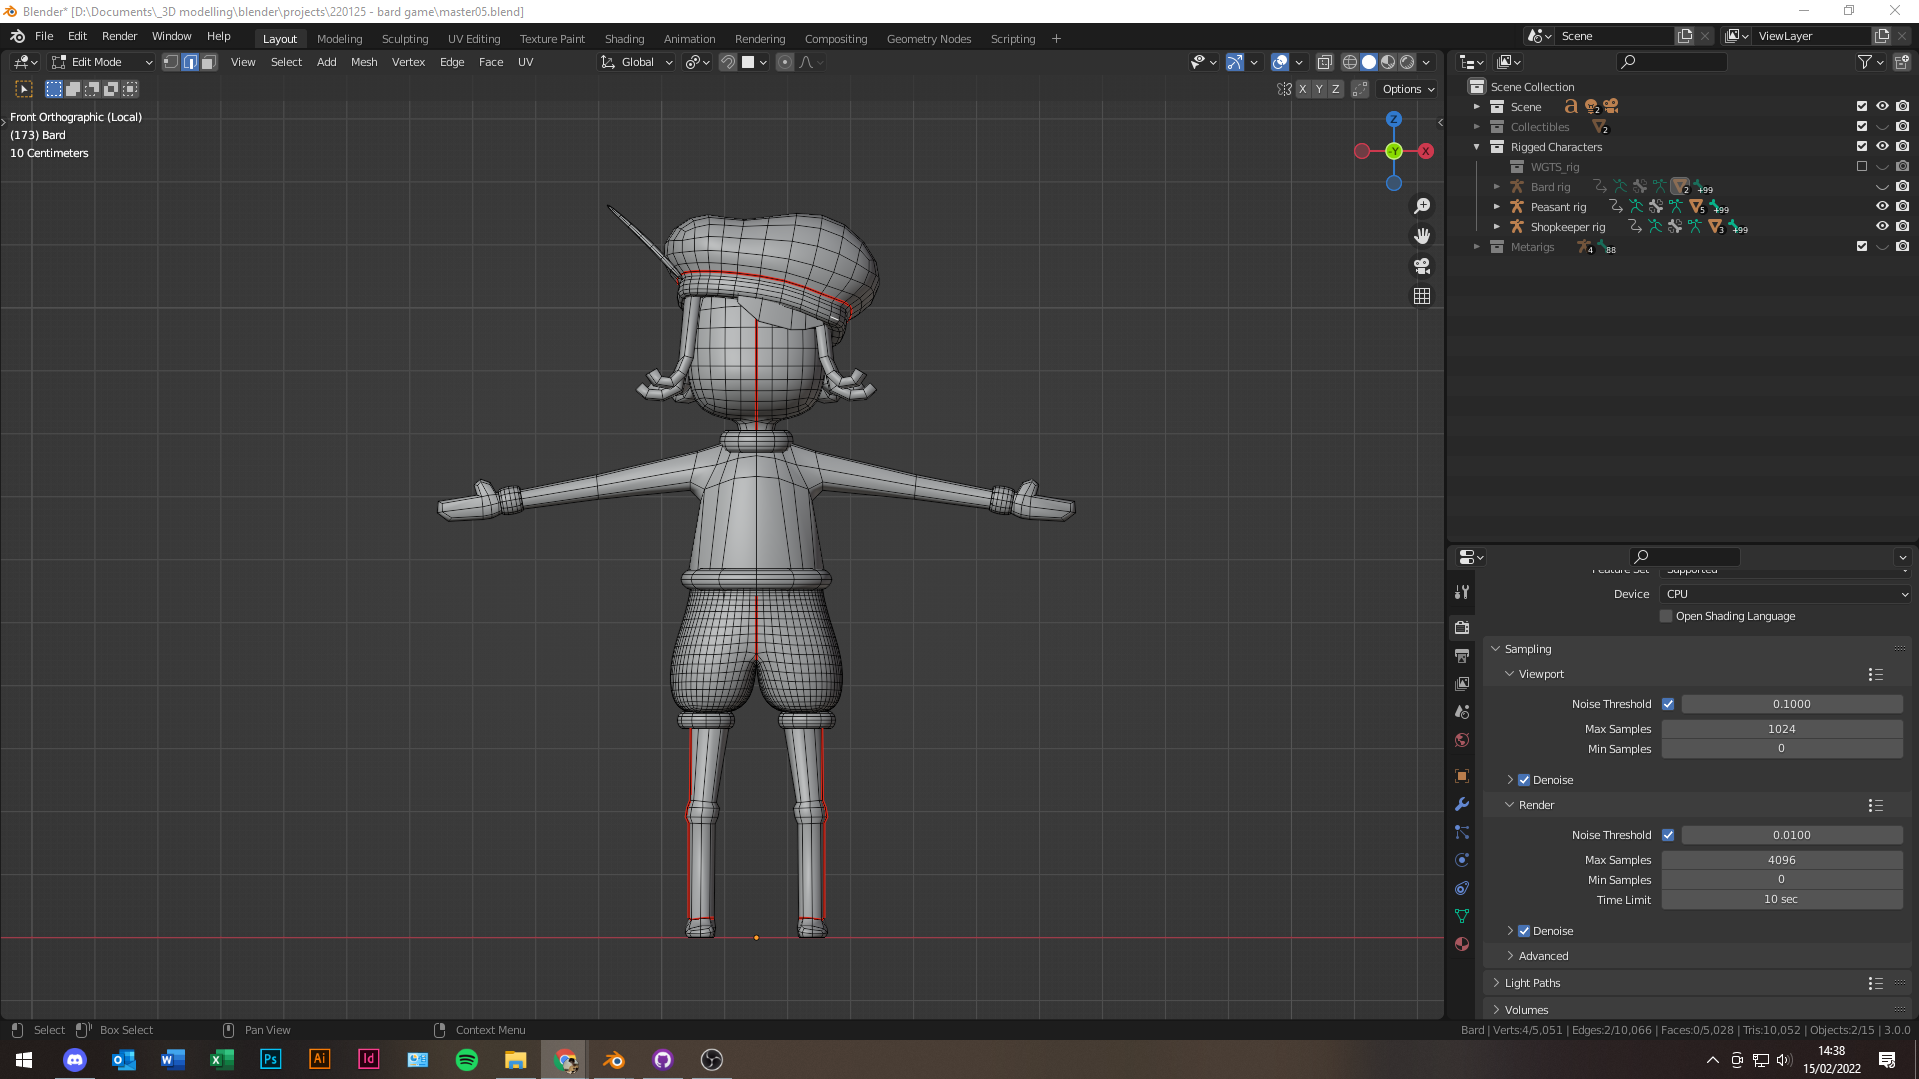
 The Bard!
Overall run-down of the process was as follows:
- Low poly block out in T-pose (in preparation for rigging)
- Unwrap UVs (in preparation for texture painting)
- Texture paint
- Add armature and rig (using Blender’s rigify add-on)
- Export as an .FBX file and upload to Mixamo
- Download Mixamo animation pack
- Export to UE4
- Done!


The Bard - in game
Chad managed to import the Bard into UE4 with little to no hitches. Some of Mixamo’s animations moved the mesh from its origin so Chad had to tick “enable root motion” in the UE4 .uasset file so that the Bard would, for example, run in place rather than run forward in the animation.
He set up the blueprints (UE4’s visual scripting) to control the Bard as a third person playable character using UE4’s default ThirdPersonCharacter as a base and got him running around the UE4 starter map.
The “game” suddenly started to feel real even though we only had the bare minimum - baby steps!
Making more 3D assets
While Chad was hard at work programming, I was creating more 3D assets that would eventually come to populate the town of Bard Game.
I ran into a lot of issues trying to export materials made in Blender over to UE4 - a LOT of issues.
I tried baking the textures so that the work I had done in Blender wasn’t wasted but it massively reduced the quality of the materials when exporting while maintaining large file sizes so I turned to re-creating the materials in UE4.
I was still able to use the UV maps I created in Blender so that wasn’t a complete waste of time, but it still felt like a convoluted workflow, however making the materials in UE4 was definitely a massive time saver in the long run as I could create “material instances” in UE4 which allowed me to make variants of the “master materials” without having to create entirely new materials.
Adopting this workflow allowed me to test the assets in UE4, ensure that they looked as they should and then package them so that I could easily give them to Chad to drag into UE4 and start plopping into Bard Game.
In short, making the materials in UE4 = good.
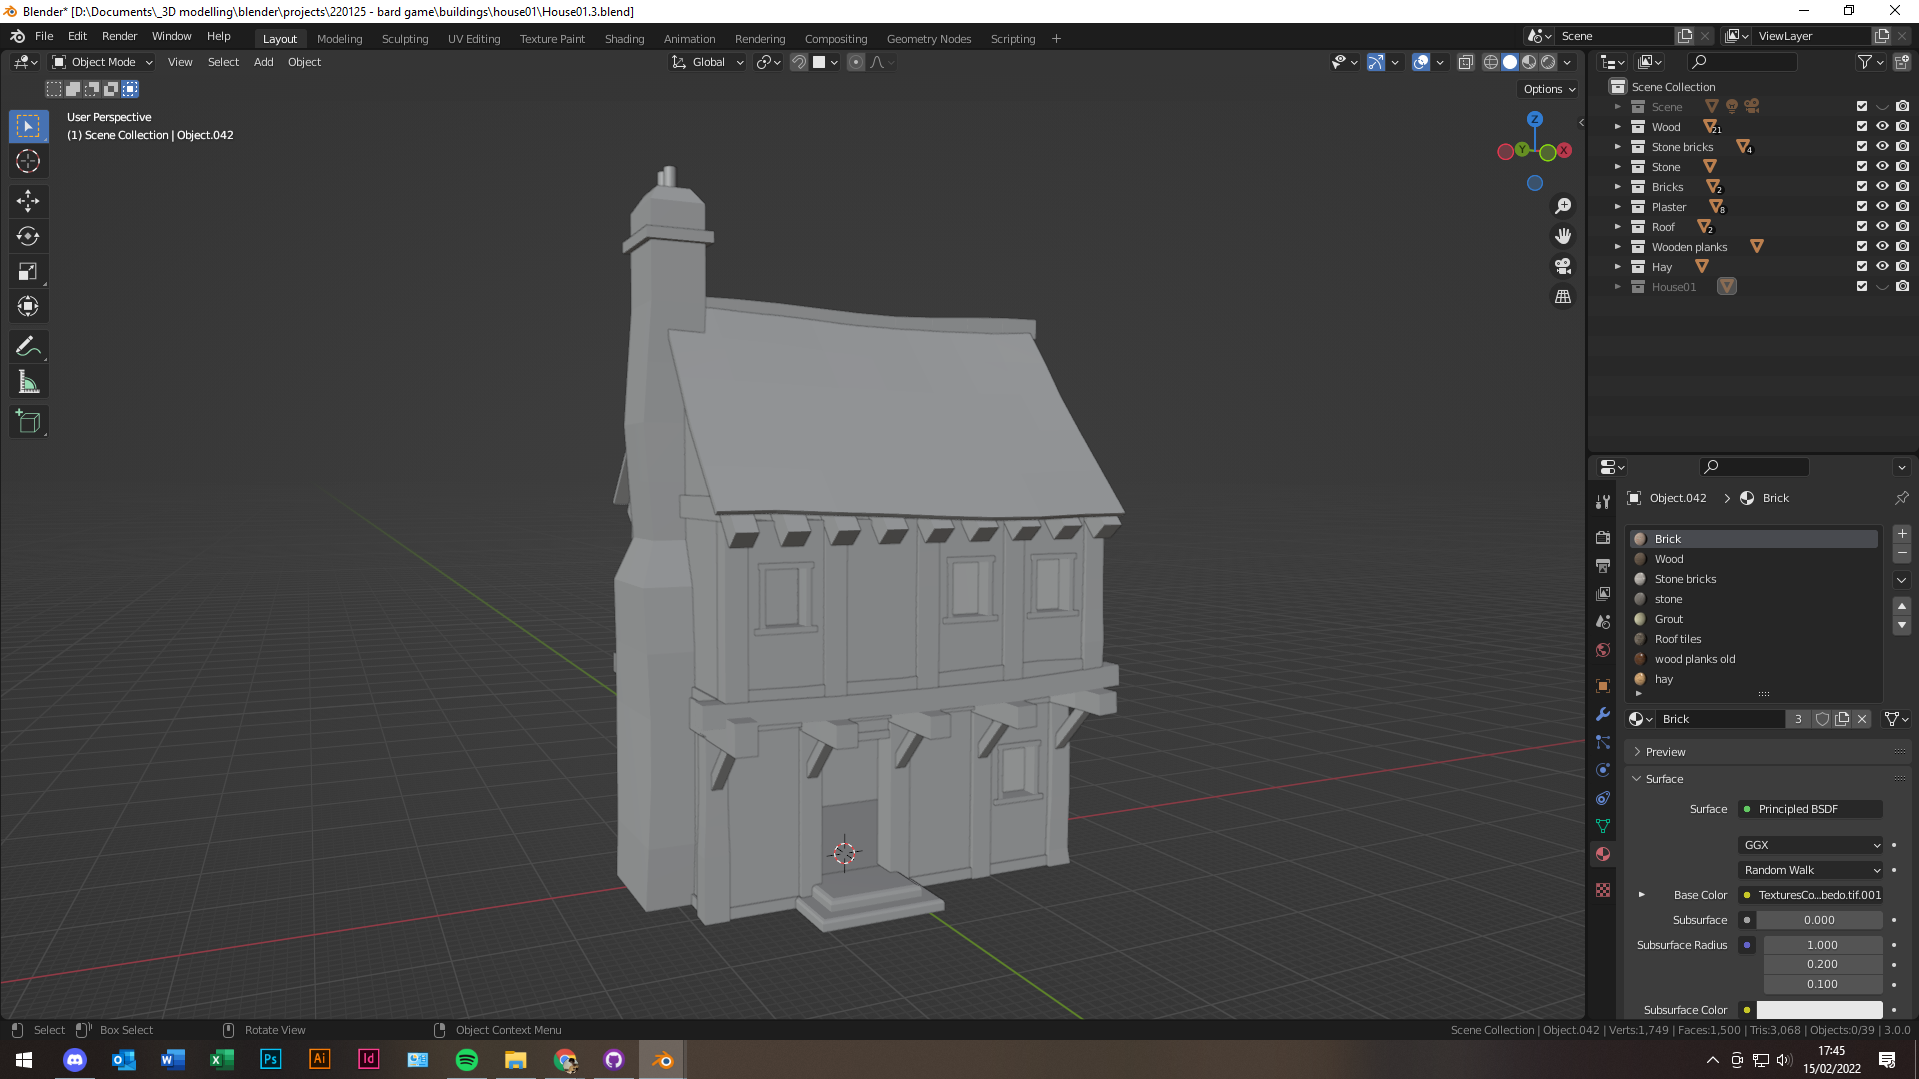
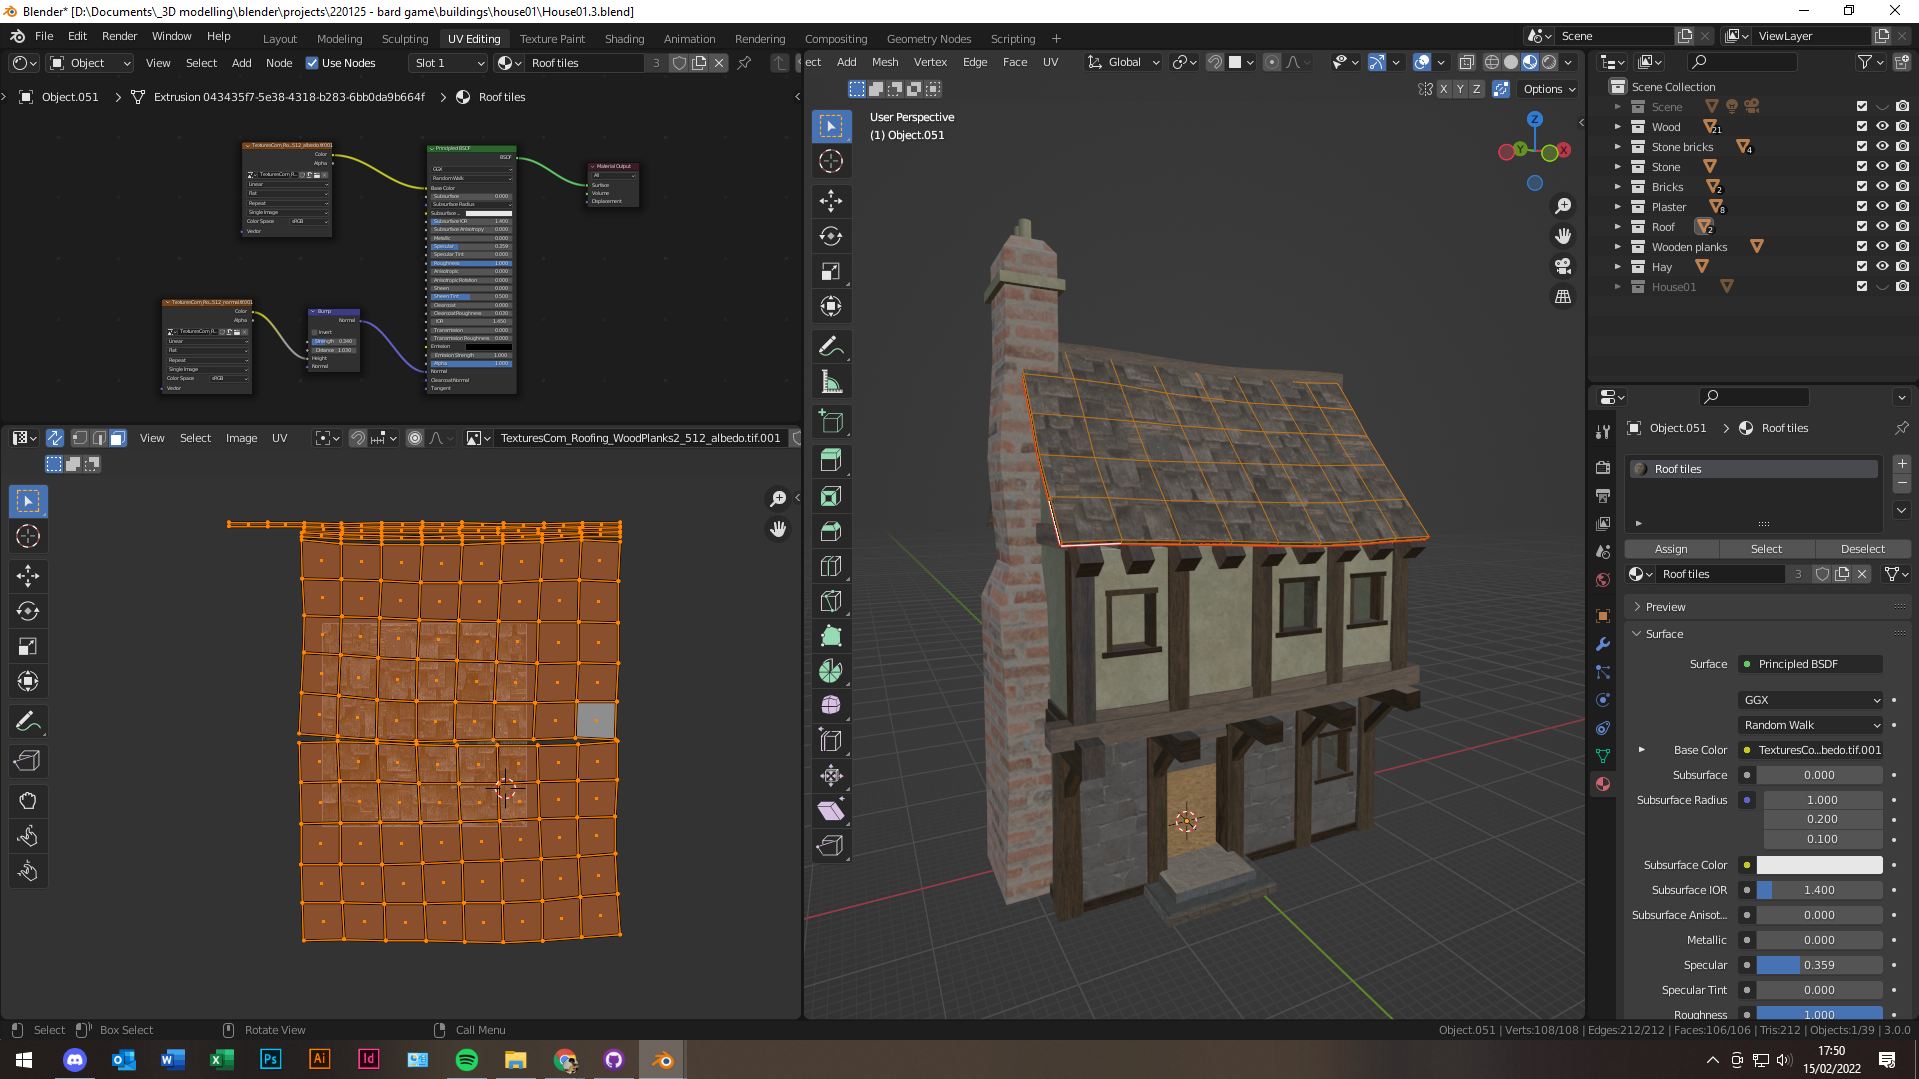
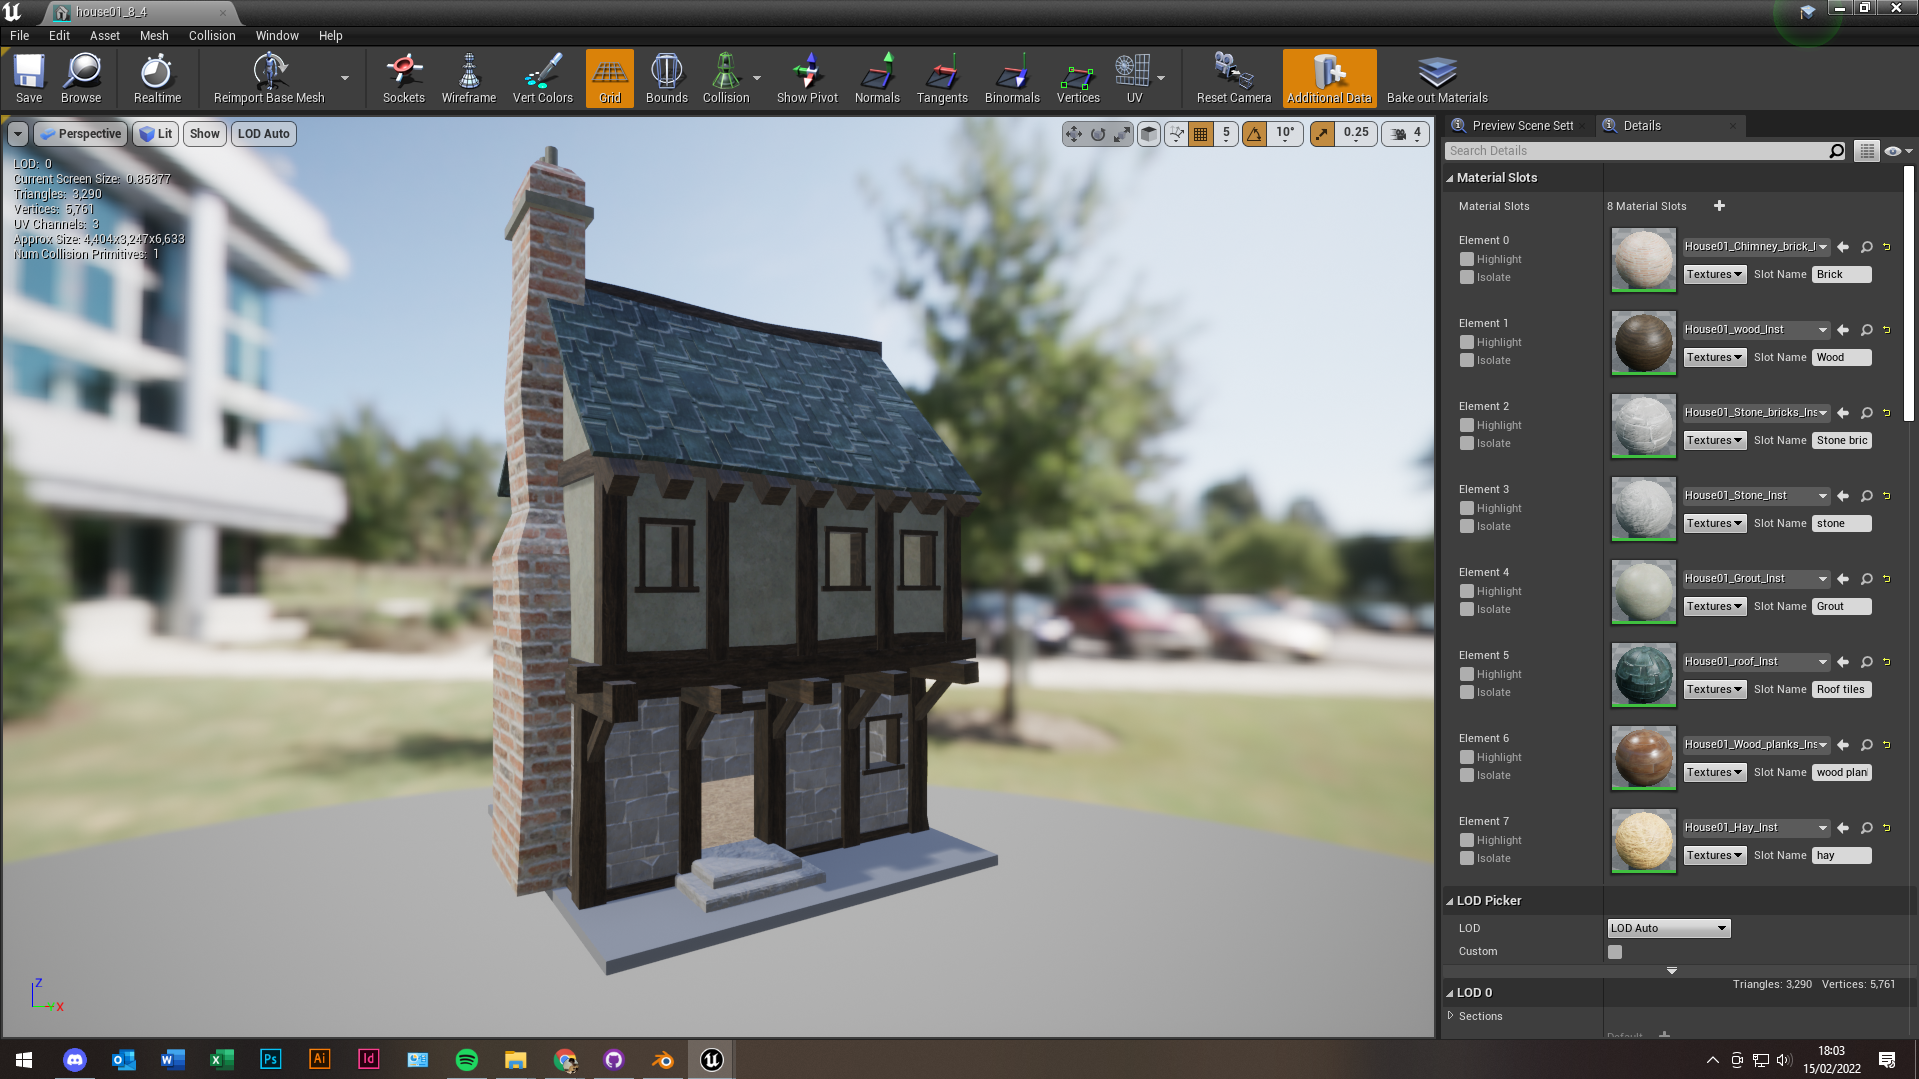
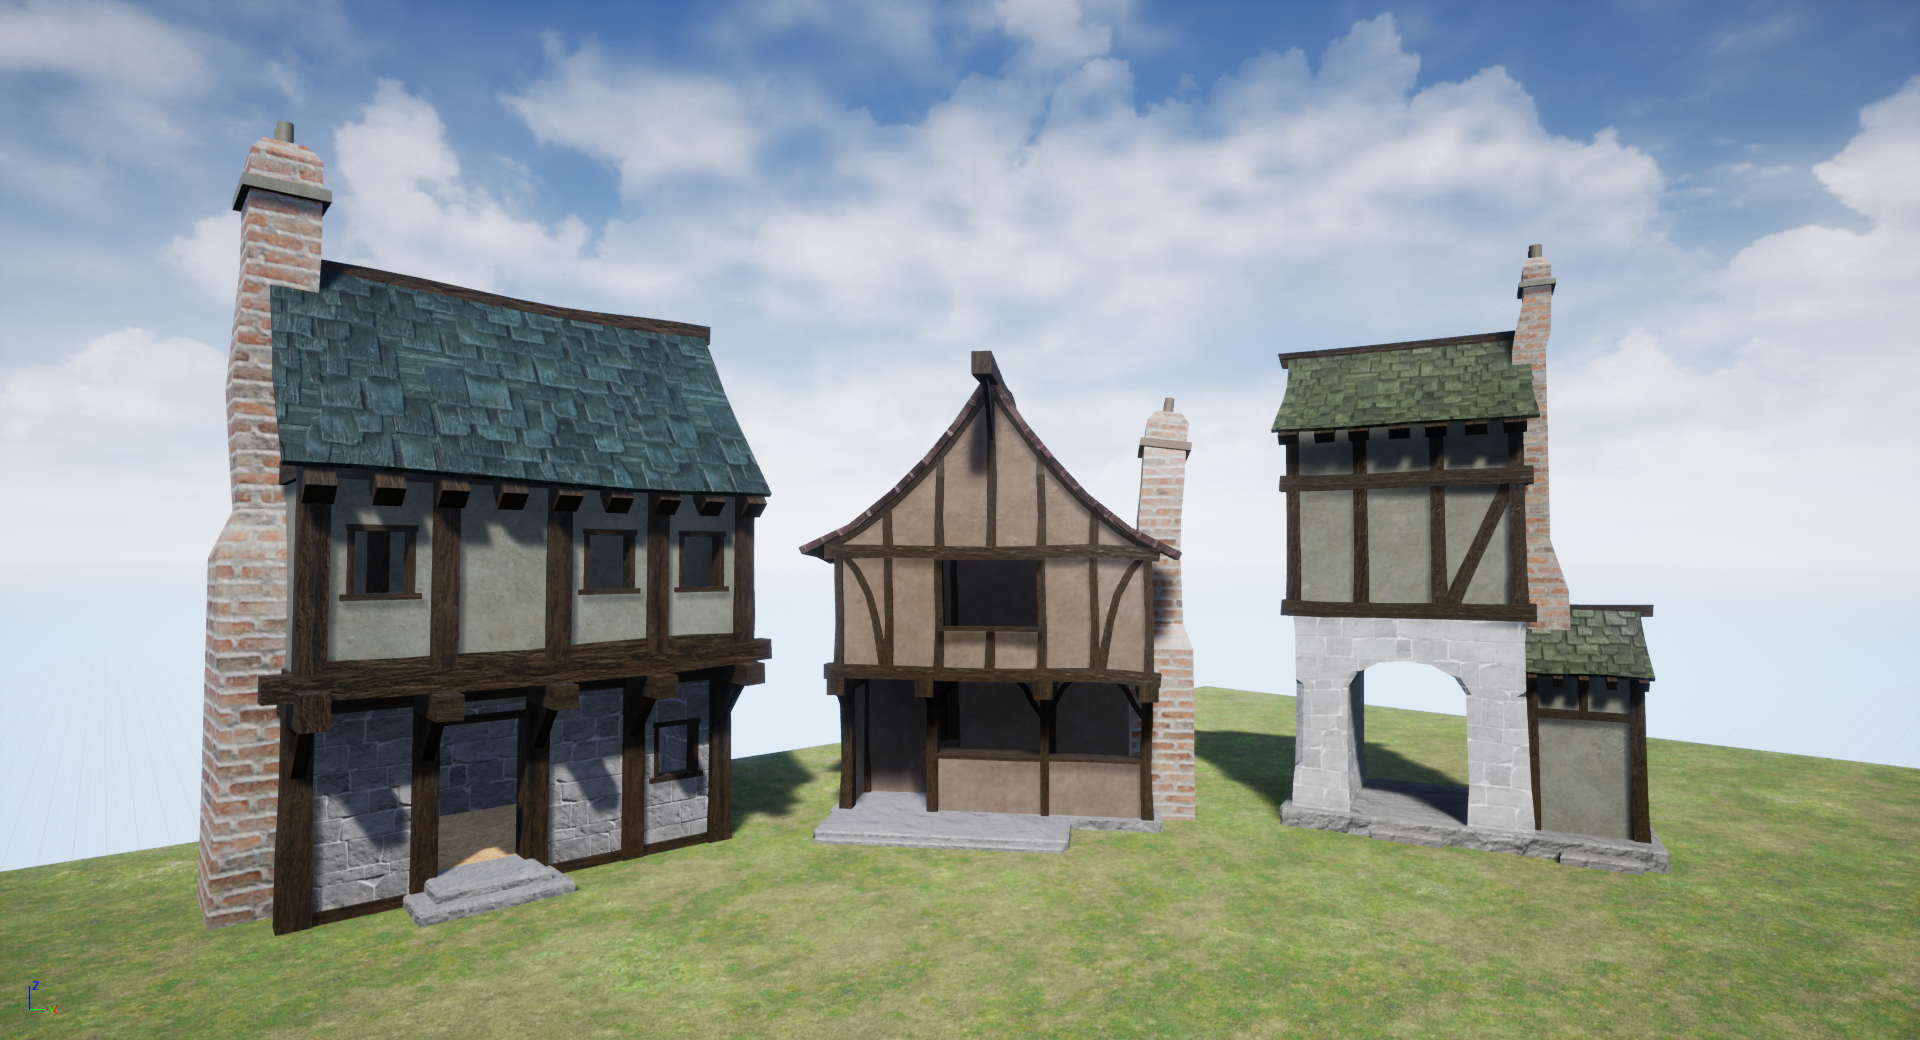 Houses for the town of Bard Game! Made in Blender + UE4
Overall run-down of the process was as follows:
- Start with the timber frame
- Block out the entire building
- Assign materials
- Mark seams
- Unwrap
- Arrange UV maps so that the materials are stretched/rotated properly
- Duplicate the entire model (as a backup) and join all parts (this will maintain the UV maps and seams as well as the material “slots” assigned in step 3. which can be read in UE4)
- Export as an .FBX file and import to UE4
- Create master materials in UE4
- Create “material instances” of these master materials which contain parameters allowing for easy variation of the master material without directly editing it
- Apply the material instances to the material slots assigned in step 3.
- Done!


By this point, Chad was making changes to the main Bard Game file while I was bombarding him with assets from all over the place that he never really had time to implement, (plus I kept distracting him by saying “can you stop what you’re doing to place my building to test it” - ugh!).
Upon observing our plight, my girlfriend Geeta, who is a whiz at all things to do with programming, gave us an in-depth tutorial on “Git”, which quite literally changed the game for a couple of hobbyists like me and Chad. It spurred us into what I can only describe as the golden age of productivity that we currently find ourselves in.
But I’ll write about Git in another blog 😏
Thanks for taking the time to read all of this! Take it easy,
Andy
![]()
If you require 3D modelling services or you if you just want to talk about 3D modelling, feel free to get in touch with me here or on LinkedIn!
Upon observing our plight, my girlfriend Geeta, who is a whiz at all things to do with programming, gave us an in-depth tutorial on “Git”, which quite literally changed the game for a couple of hobbyists like me and Chad. It spurred us into what I can only describe as the golden age of productivity that we currently find ourselves in.
But I’ll write about Git in another blog 😏
Thanks for taking the time to read all of this! Take it easy,
Andy
If you require 3D modelling services or you if you just want to talk about 3D modelling, feel free to get in touch with me here or on LinkedIn!